|
|
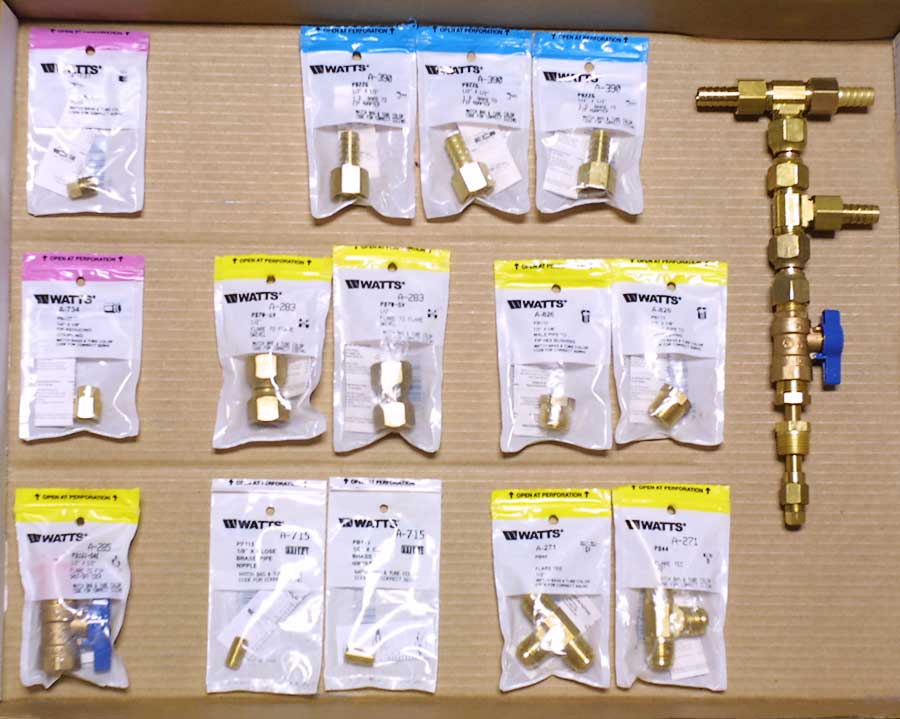
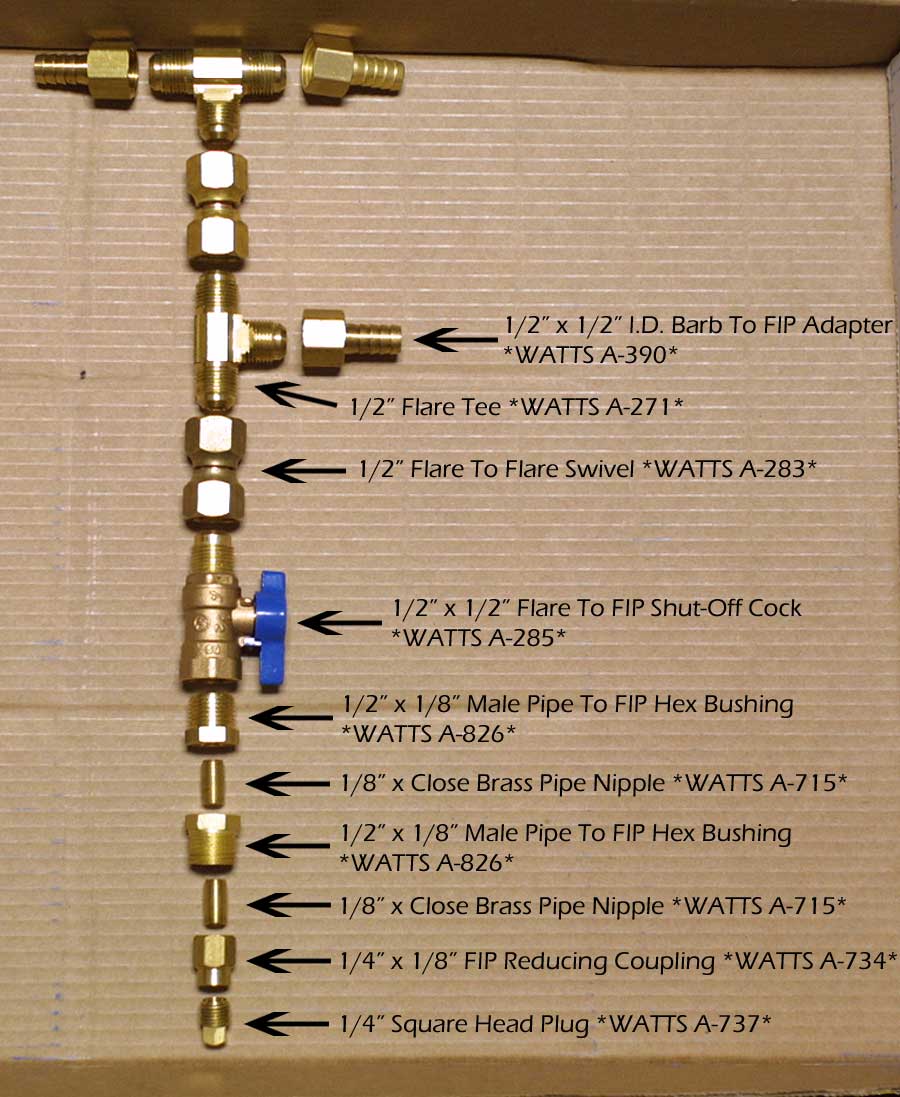
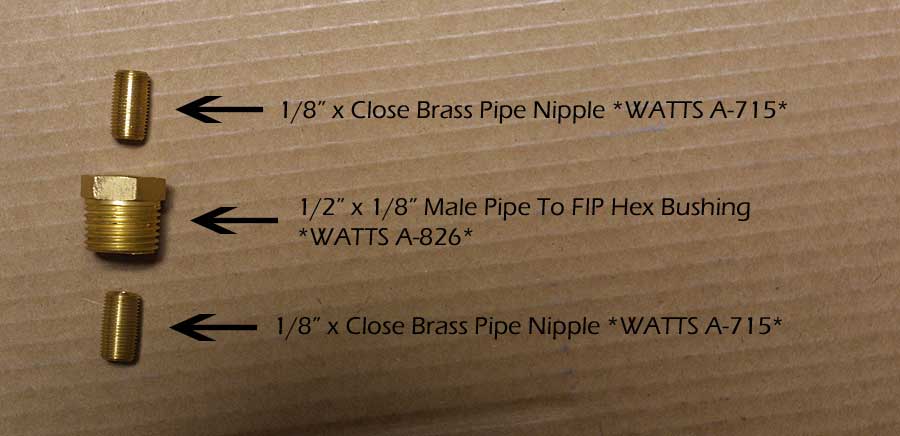
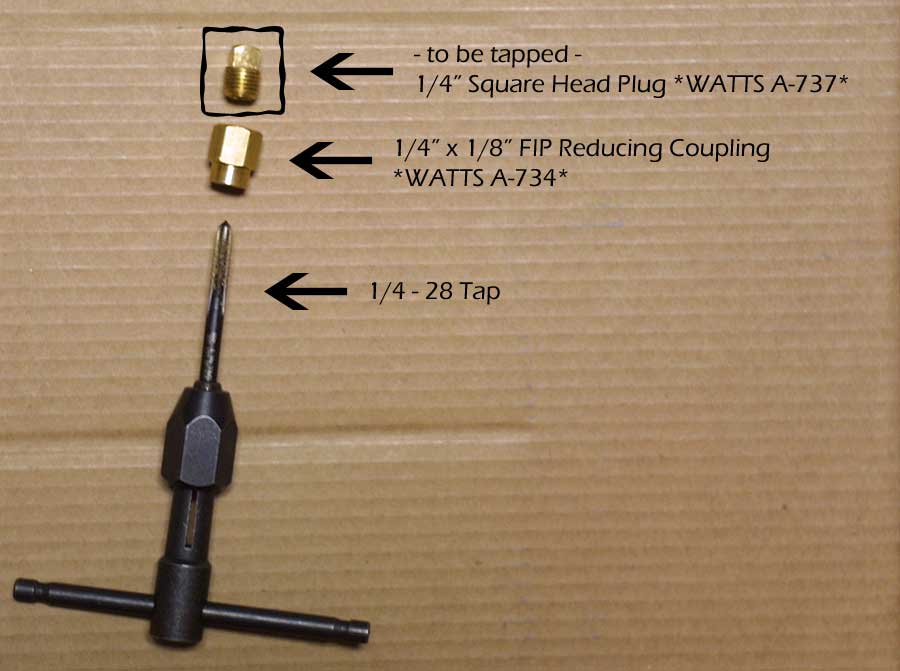
| I used all of the brass fittings in the picture below, to make what you see assembled to the right of them. That will be the "inner-core" of the middle burner on my 3-burner assembly, which you can see completed at the bottom of this page. |
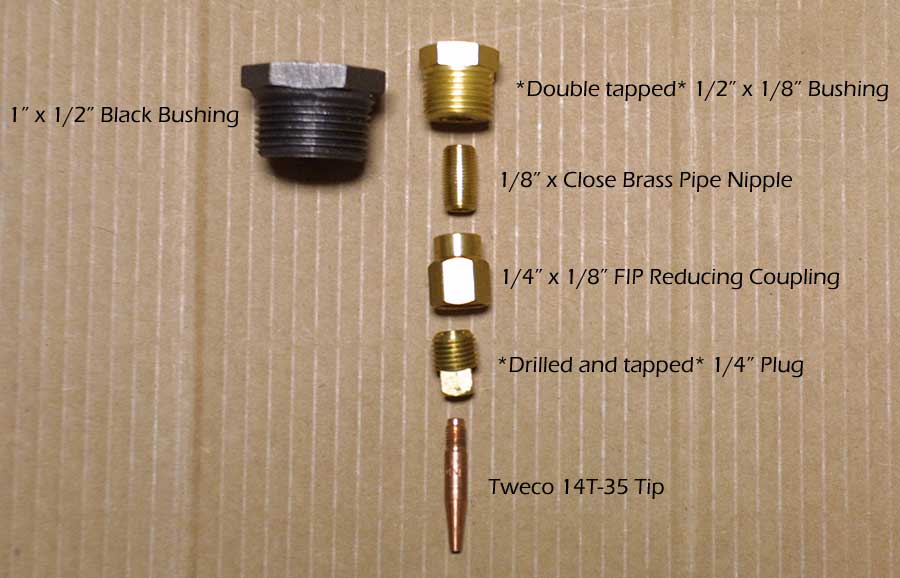
| Here is a break down of all the fittings, with part numbers. |
|
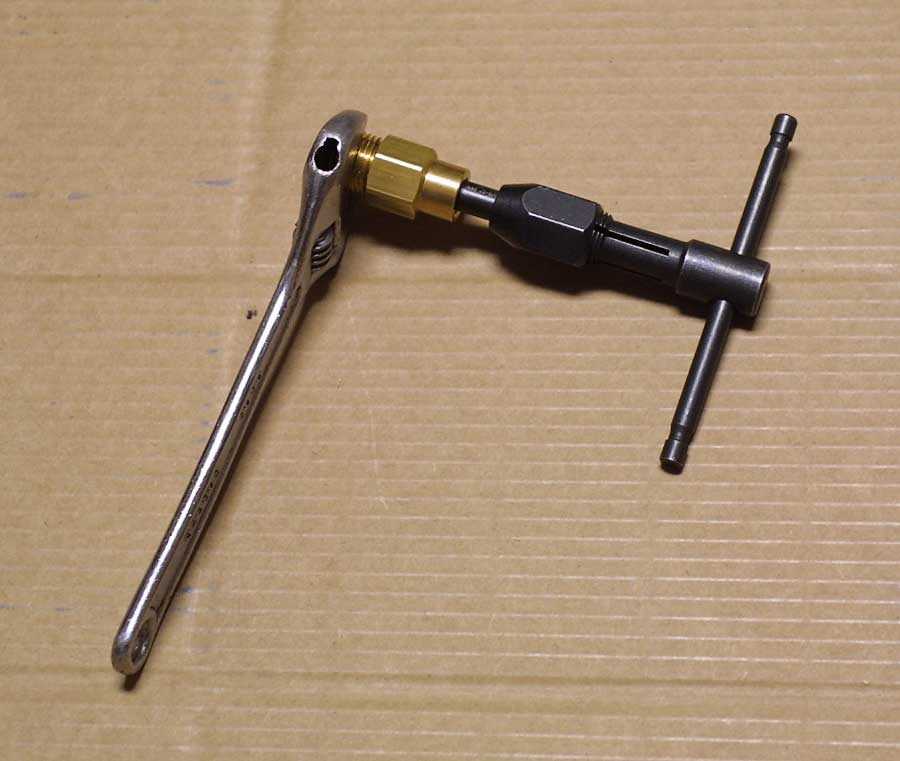
This burner is very simple to make. Only two of the brass fittings need to be tapped, and everything else just screws together. The first fitting that we will tap will be a 1/2" x 1/8" bushing. It already has threads on one side. Now we're going to tap the other side too, so it will be "double tapped". It is very important to make sure you get a tap with "Pipe Type" threads. (Pipe threads get smaller the further they go in on a female fitting, and larger the further they go back on a male fitting.) Before we tap it, it will make it easier if we drill the hole a little larger first. So I used a little assembly of brass fittings to make sure I drilled straight. Also, I screwed the fittings only part way together, so that my drill bit couldn't go all the way through the bushing, and mess up the threads that are already on one side. Then I wrapped some electrical tape around the fittings so they wouldn't turn, and loose my adjustment. You don't want the drill be to be able to reach all the way through the bushing, and ruin the threads that are already there on one side. |
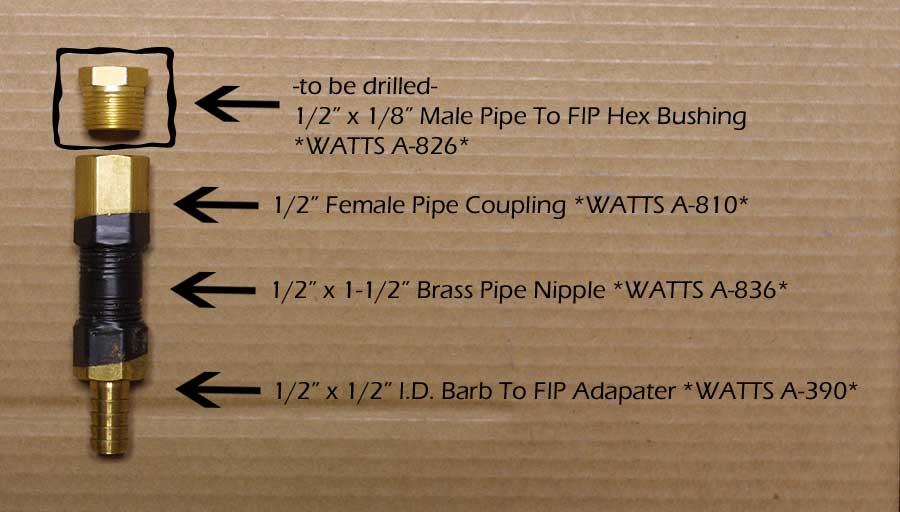
| I used an 8" crescent wrench to hold the bushing when I drilled it. You want to hold back on the bushing that you're drilling in, not on the assembly. The bushing will have a tendency to want to turn on you, so you will have to hold back firmly. Use some "3 in 1" oil on your drill bit and taps while you work. |

|
After I had the hole drilled the right size, (only half way through, since the other side already has threads), I used a different assembly to help make sure I tapped it straight. Be sure to keep an eye on it while you're tapping. You only want to tap in part way. You must leave room for the threads on the fitting that will screw into this piece to be able to tighten down, before the threads run out. It is possible to tap too far. You also don't want to tap so far that you run into the threads on the other side of the bushing. |
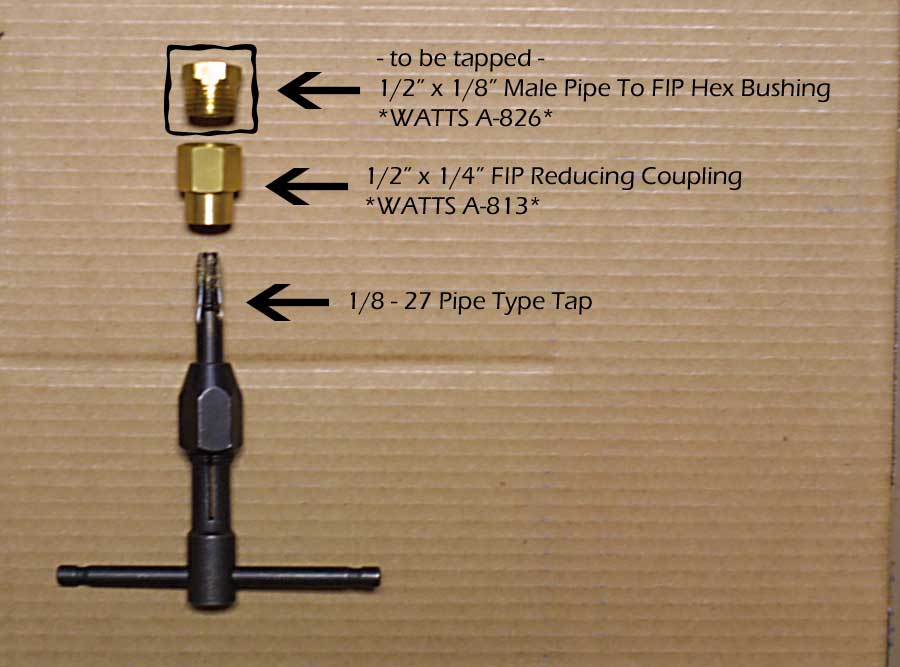
| Again, I used an 8" crescent wrench on the actually bushing that I'm tapping, not on the assembly that is there to keep the tap straight. |
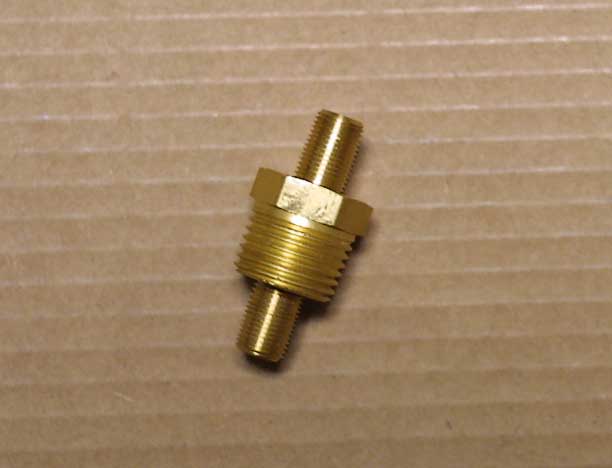
| Now you should be able to screw an 1/8" Brass Pipe Nipple in each side of your "double tapped" bushing, like this. |
|
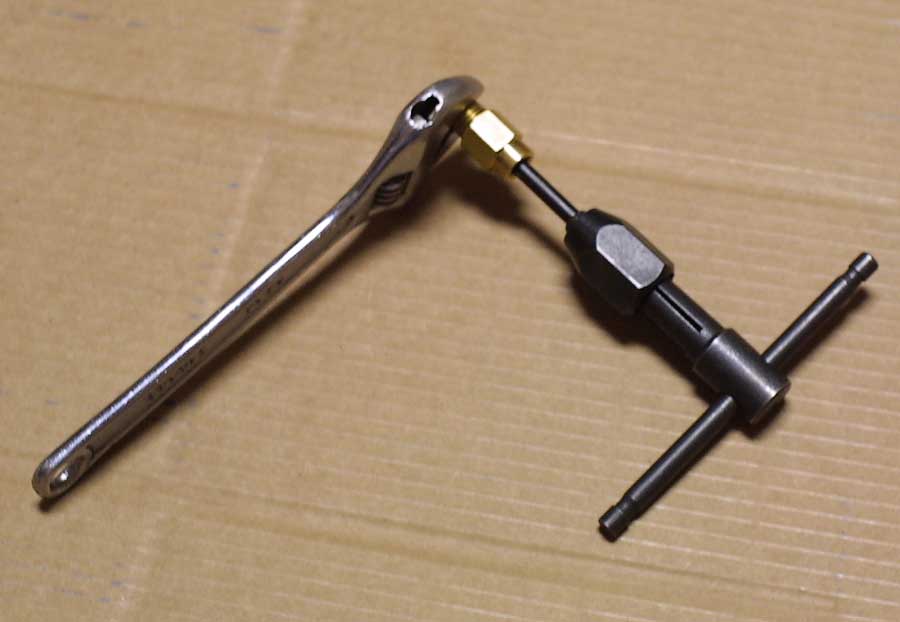
Now we will drill the other brass fitting that needs to be tapped. It's a 1/4" brass plug, and it will NOT be "Pipe Type" threads. Unlike before, this one will need to be drilled all the way through. Again, I used an assembly to keep my drill bit straight. |
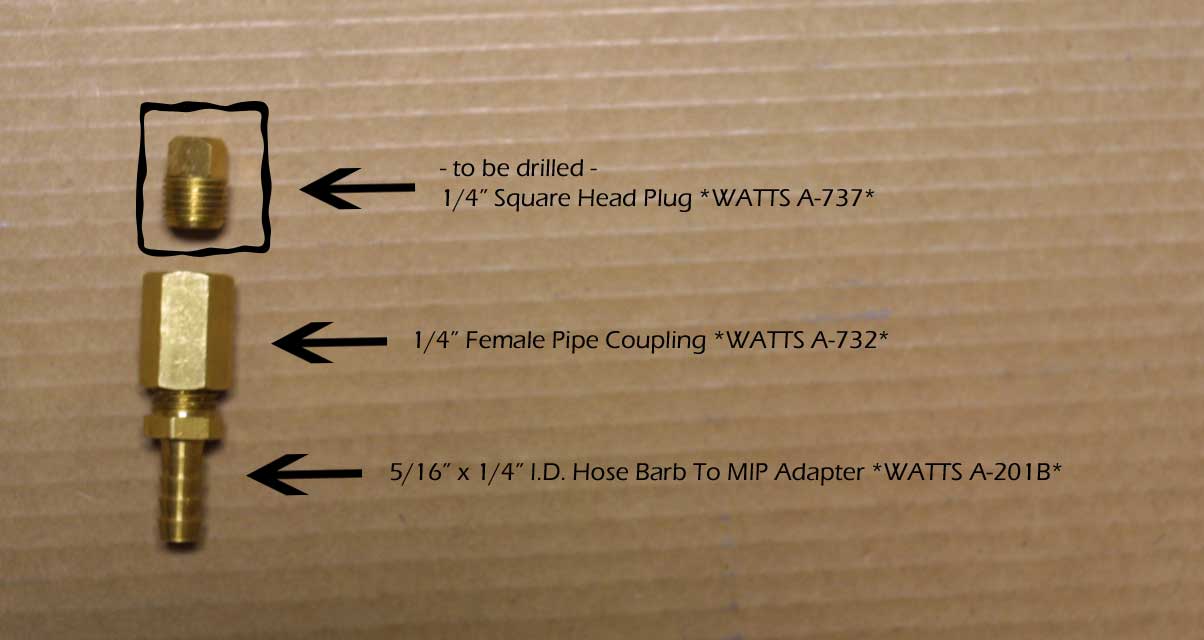
| Use a crescent wrench on the plug, to keep it from turning while you drill it. |
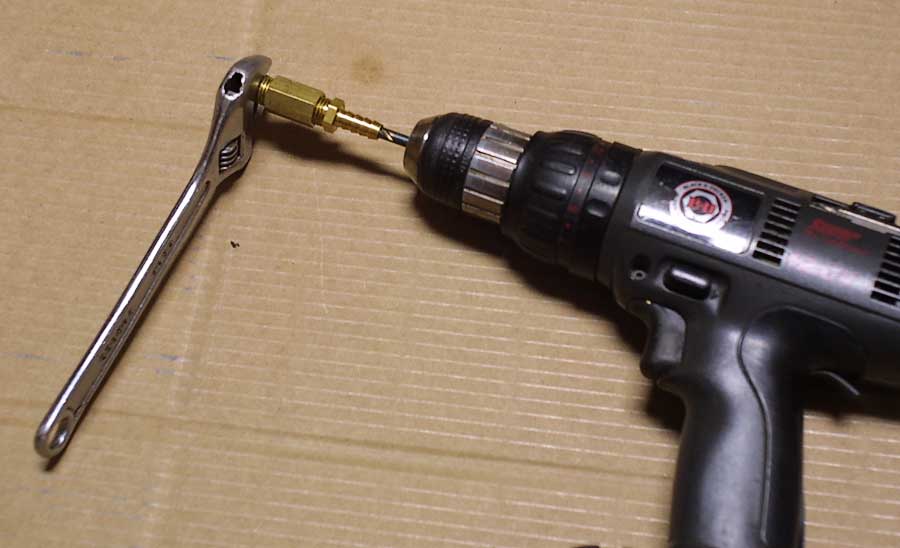
| Now you will need to tap the plug. |
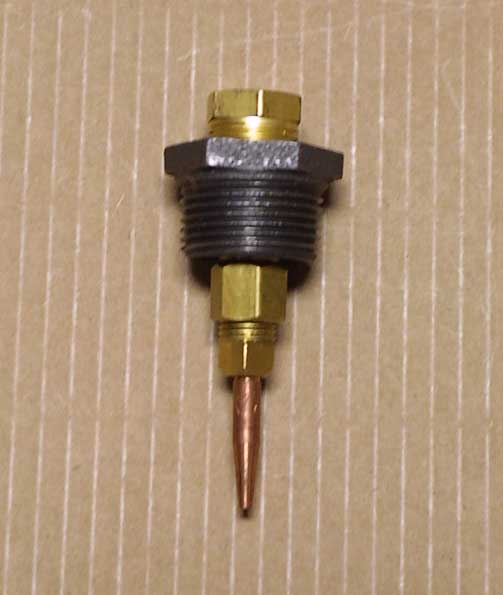
| Now that you have the plug drilled and tapped, you will be able to screw a welding tip into the end of it, which the propane will shoot through. |
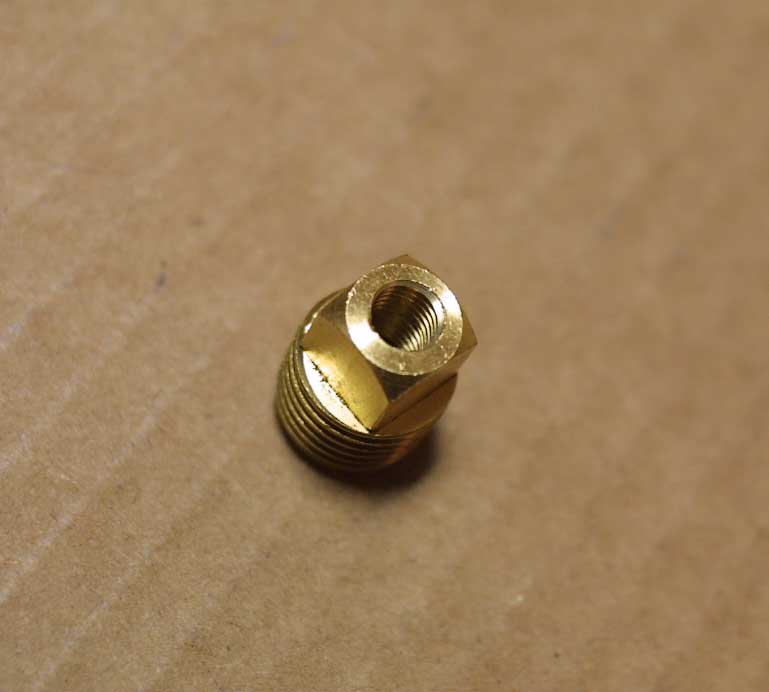
| Here are the tips that I use. "Tweco 14T-35". I tried several tips, and these worked the best. The threads on these tips are 1/4-28 threads. |

|
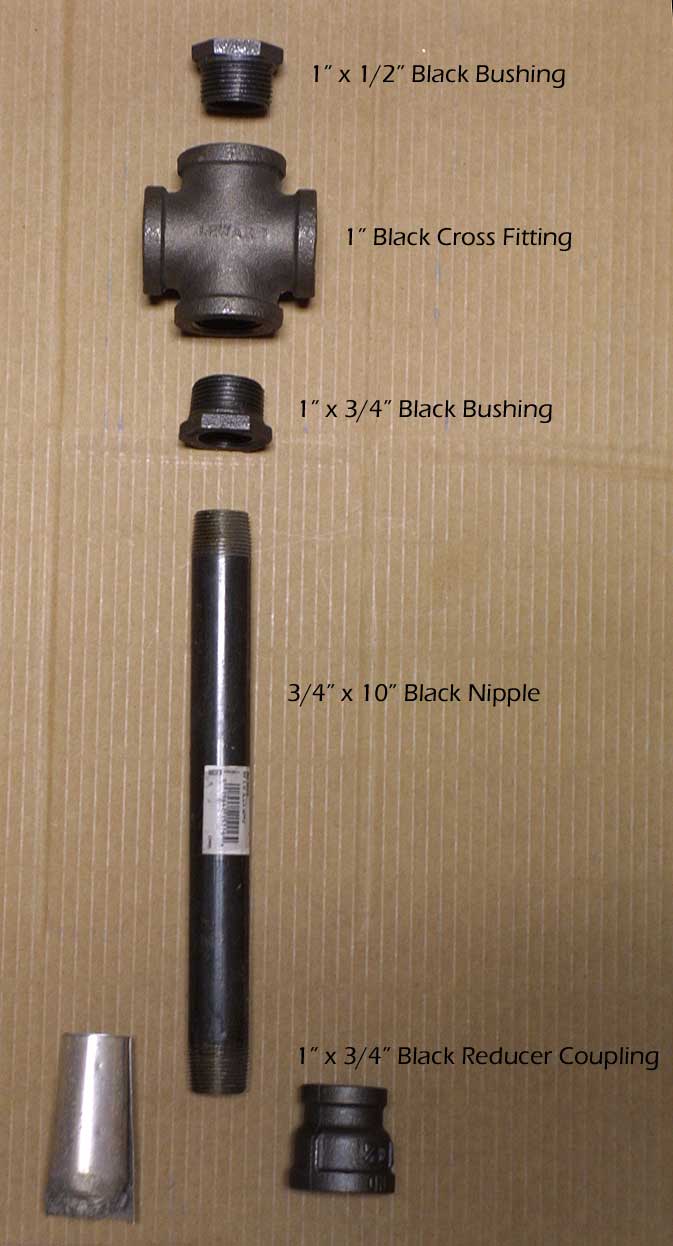
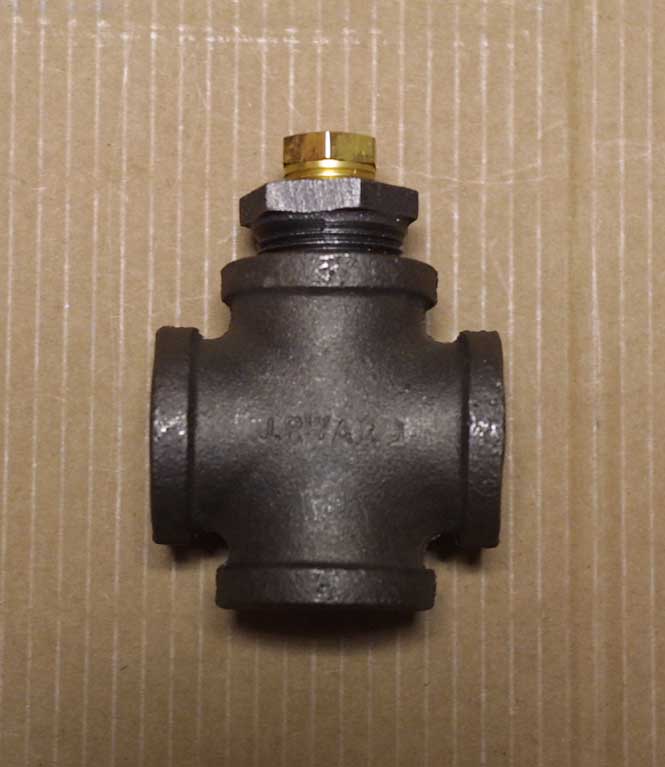
Here are the black pipe fittings that you will need for this burner. Be sure to get "black" pipe fittings, NOT galvanized. The coating on galvanized fittings can be toxic. The cross fitting is what makes this burner unique. There are many designs similar to this one, but without the cross fitting. I built many burners before I came up with this exact design, and it works very well. No choke is needed. I can turn it up and down without needing to adjust any choke, and the flame looks good, and burns blue, all the way up and down in pressure. There is a saying, "If the flame is blue, good for you". You will need to have a flare on the end of the burner, to slow down the propane/air, otherwise it will blow itself out. It actually ran O.K. without the flare, but I couldn't turn it up real high, or it blew itself out. I made a proper 1:12 ratio flare by rolling up some thin sheet metal I had, (shown in pic below), which worked the best, but it kept melting when I was testing the burner, so I put on a reducing coupling, and that worked fine too. If you wanted, you could make a good flare out of some stainless steel, but I just didn't have any at the time. It shouldn't need a flare at all when you put it in the forge. I have found the reducing couplings to work plenty good enough, for testing the burners outside of the forge. |
|
Now it's time to start putting the pieces together. Be sure to use a sealant of some kind, preferably for gas. I used yellow Teflon Tape, (designed for gas), on the Tweco tip, and a Teflon enriched Pipe Dope on all the rest of the fittings. Note: For the pictures below, I just screwed them loosely together by hand, just for the pictures. Also, when you're finished, you can check all of your fittings to make sure there are no leaks, by spraying some soapy water on them, and watching for air bubbles. |
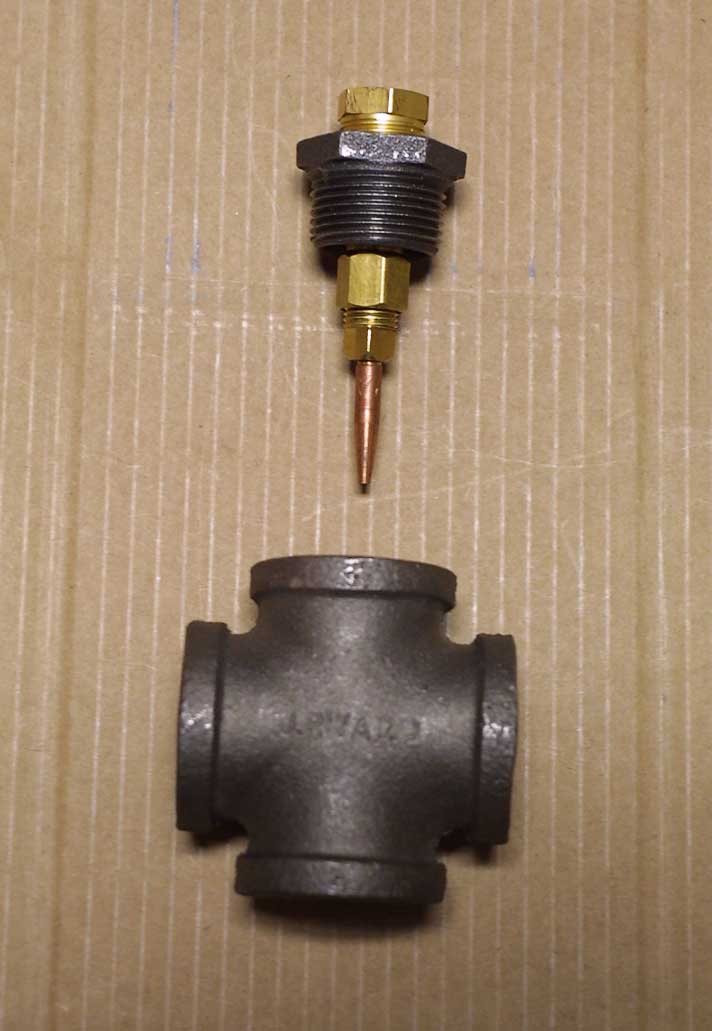
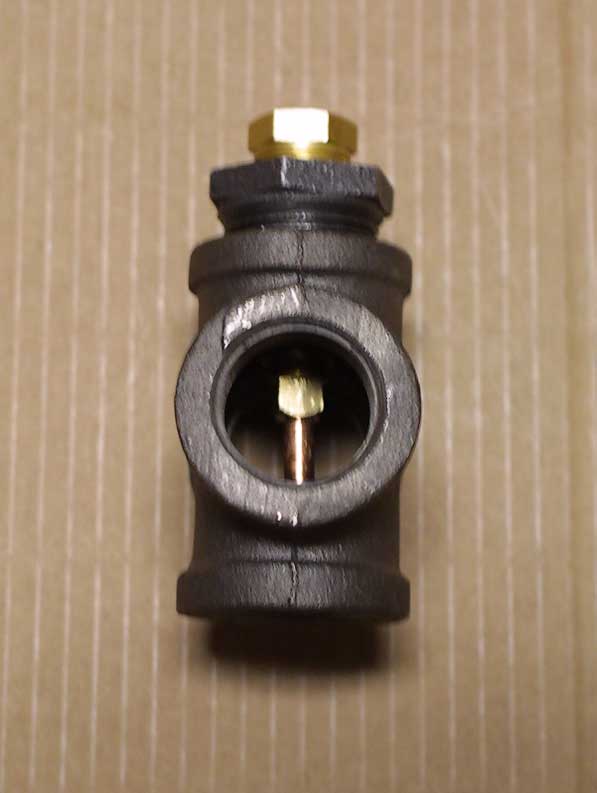
| Here is a side view of the cross fitting, with the welding tip inside. |
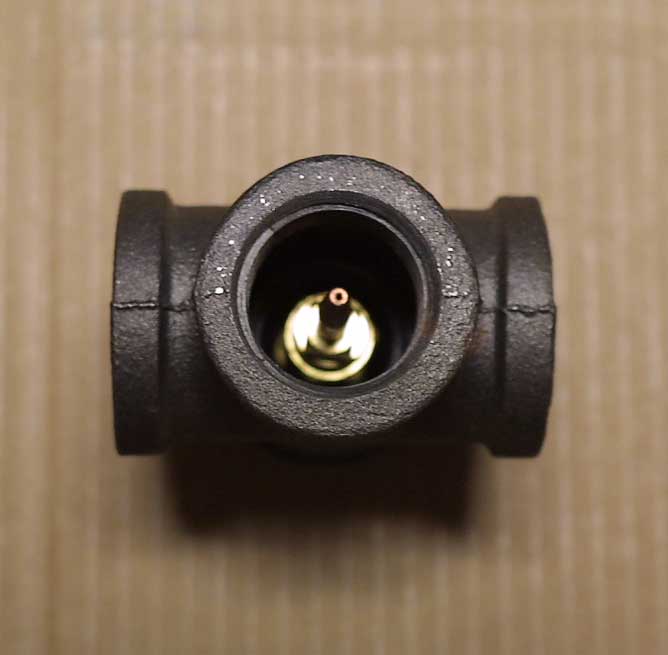
| And a bottom view. |
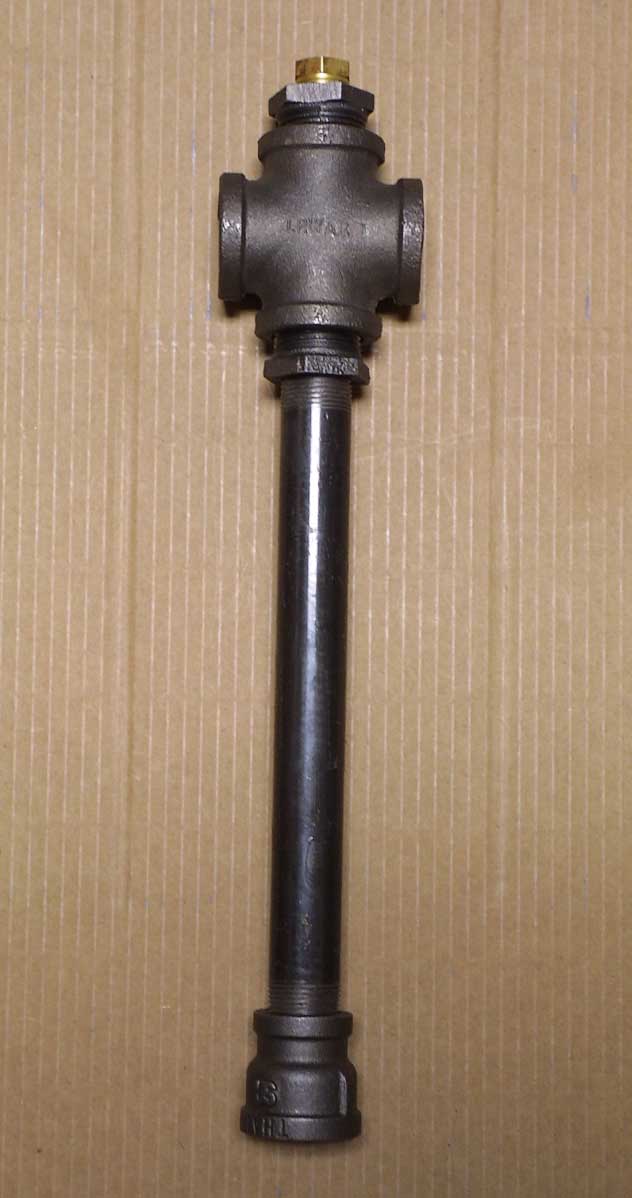
| Now screw the rest of your black pipe fittings together. |
|
Screw in an 1/8" Brass Pipe Nipple on the top, and you can do whatever you want from this point on. I chose to add a bushing and then a cock valve, and the rest of my assembly, as shown in the pictures at the top of this page, and also further down. |

|
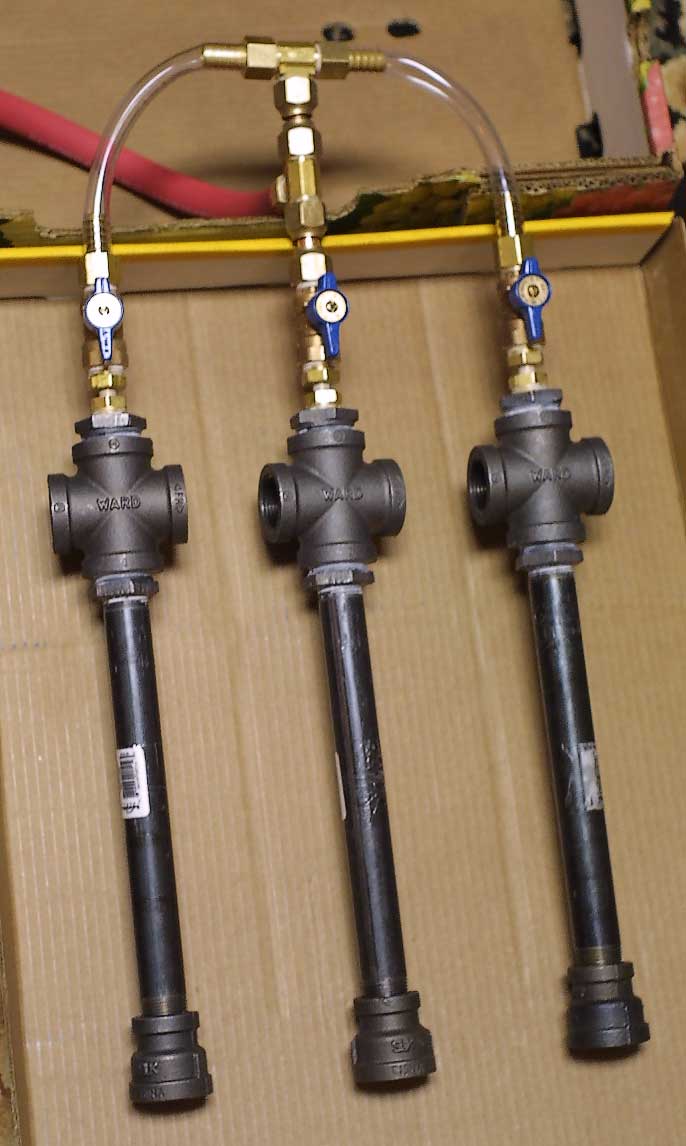
Here is my 3-burner assembly, all screwed together tightly with pipe dope. I used some flexible tubing to connect the burners together. I still need to add some hose clamps to hold the tubing on securely, but other than that, they're done. Now it's time to go outside and check them out! |
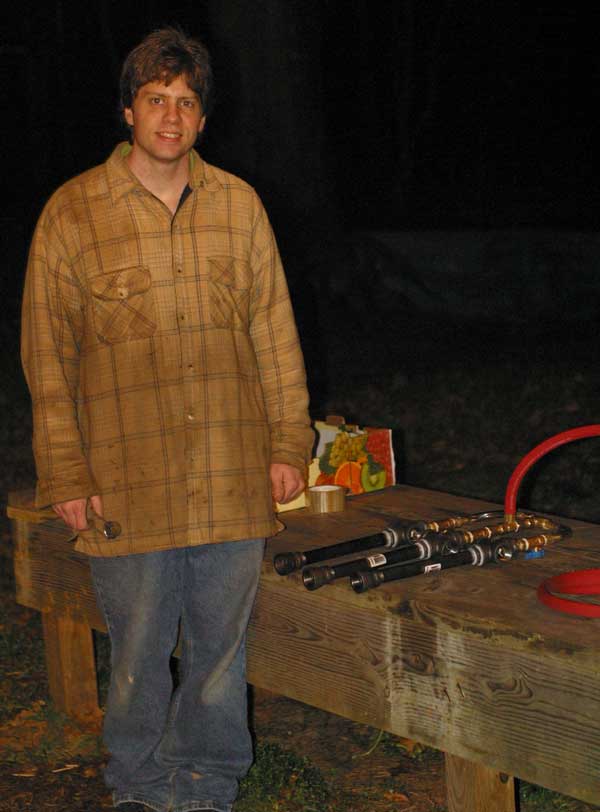
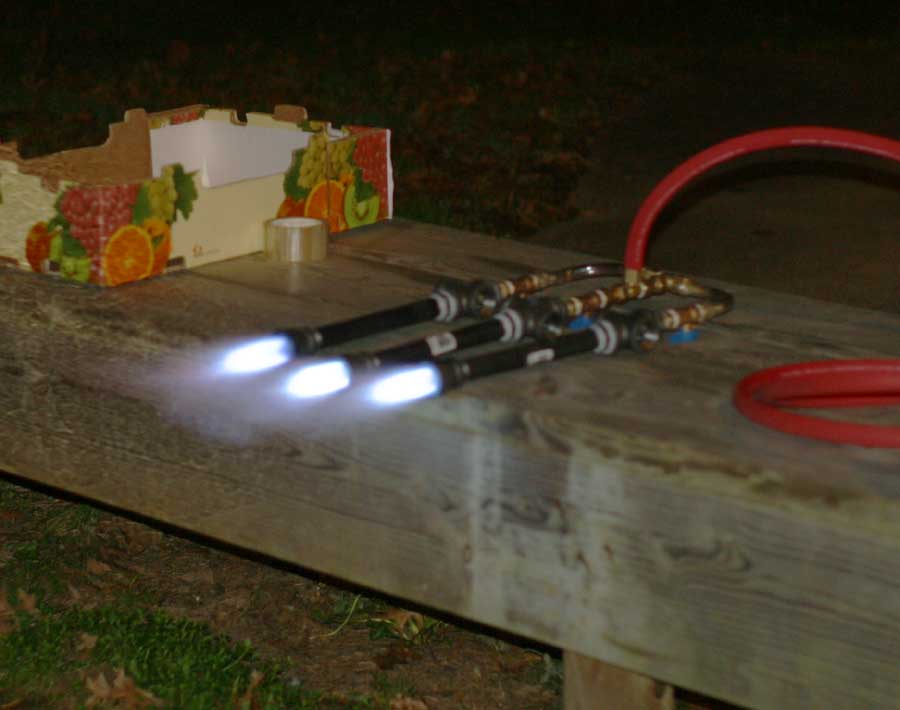
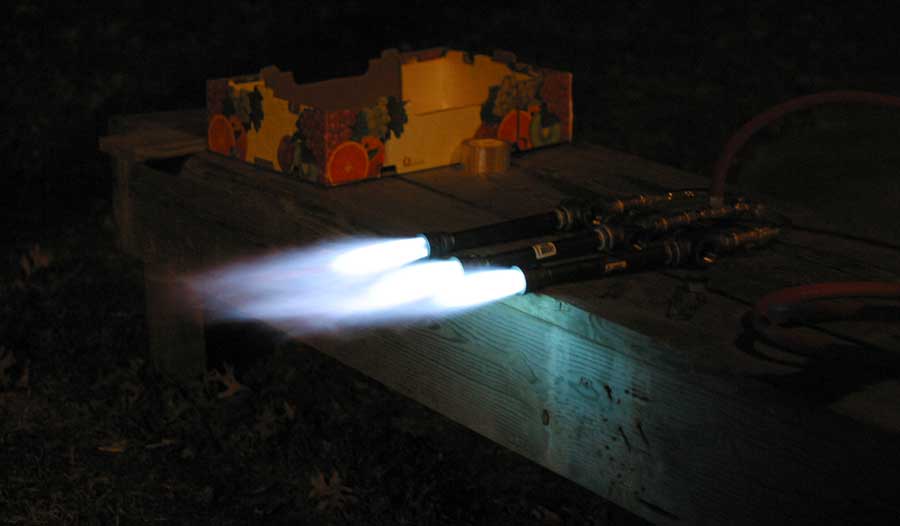
| Here are some pictures of me outside with my 3-burner assembly. All three burners work nice and even together, because of the large 1/2" I.D. tubing, and 1/2" brass fittings that are connecting everything together. |
|
|